
Snowflake Data Sharing Across Cloud Providers (AWS to Azure) Using Listings
What is a Listing in Snowflake?
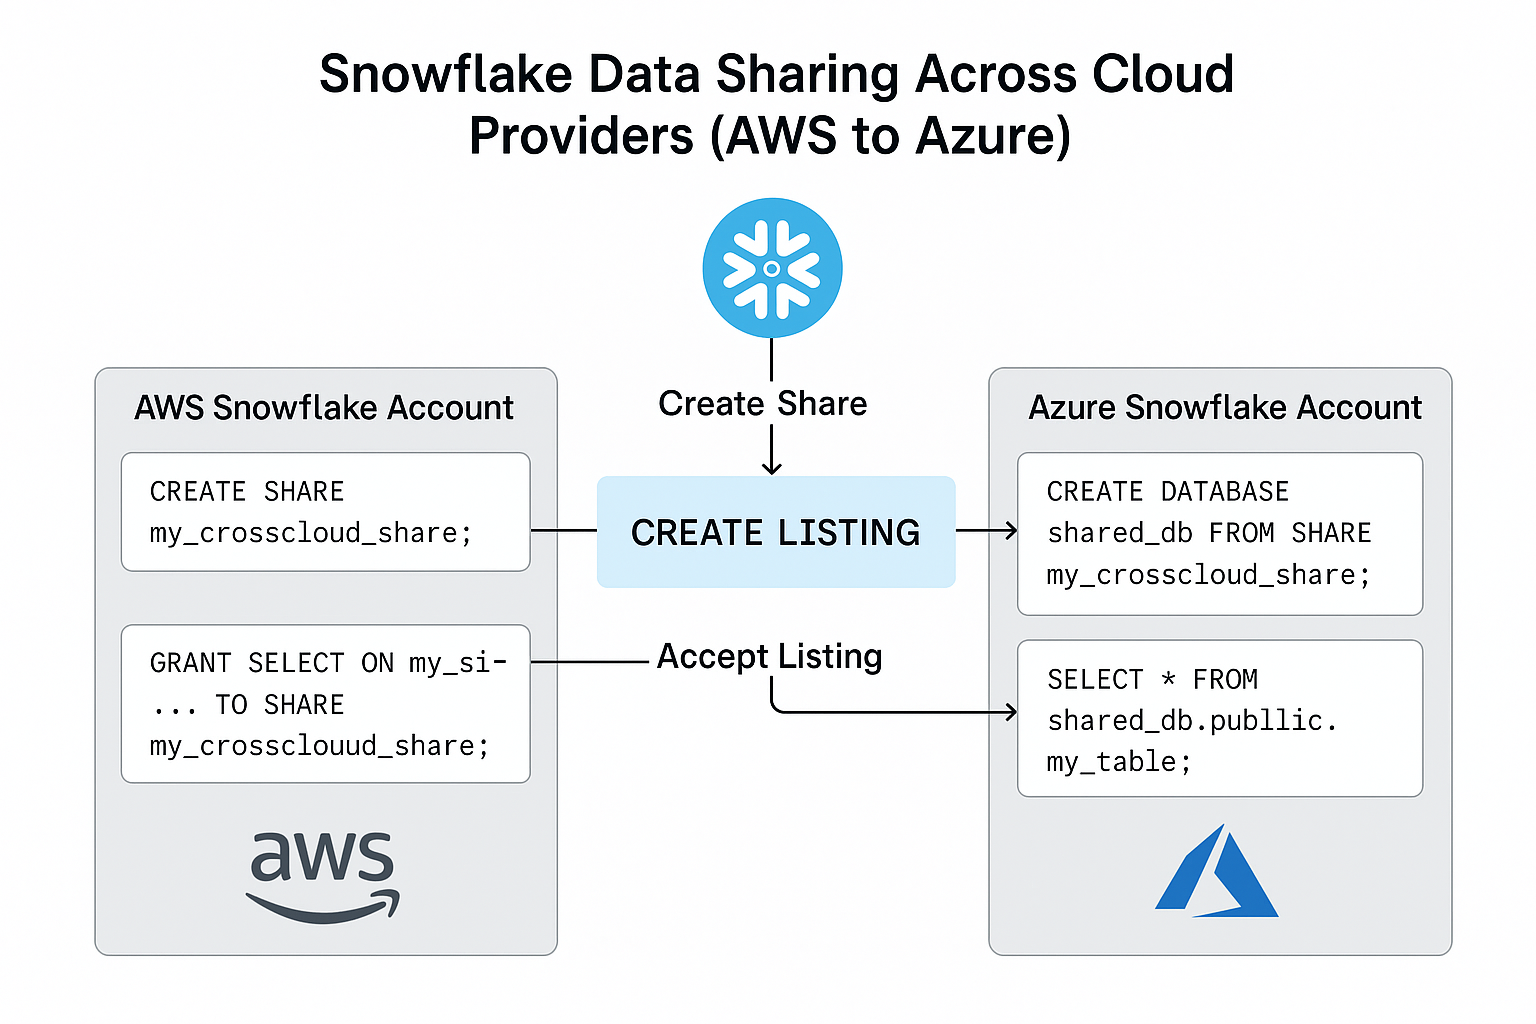
A Listing is a way to publish and distribute data from one Snowflake account to another, even across cloud platforms and geographic regions. It builds on top of Shares, but makes them discoverable and consumable by specific accounts or the broader Snowflake Marketplace.
For private (controlled) sharing, Listings act as a bridge: we create a share, wrap it into a listing, and then distribute that listing to target accounts.
Types of Listings in Snowflake
- 🔓 Public Listings
-
Available on the Snowflake Marketplace.
-
Discoverable by all Snowflake users.
-
Ideal for open data, commercial datasets, or public APIs.
-
Can include documentation, sample queries, and usage instructions.
-
- 🔐 Private Listings
-
Shared only with specific Snowflake accounts.
-
Not visible in the public Marketplace.
-
Best for secure, cross-org, or cross-cloud data sharing.
-
Requires the target account locator during listing creation.
-
To walk through the process together, we’ll use:
- Source: A free Snowflake account on AWS.
- Target: A free Snowflake account on Azure.
- Goal: Share a table from the AWS account to the Azure account using a Private Listing.
🚀 Step-by-Step Guide
Follow along with me step by step as we set up Snowflake data sharing from AWS to Azure using a Private Listing. We’ll start from the provider side and and go all the way to seeing the shared table reflected in the consumer account.
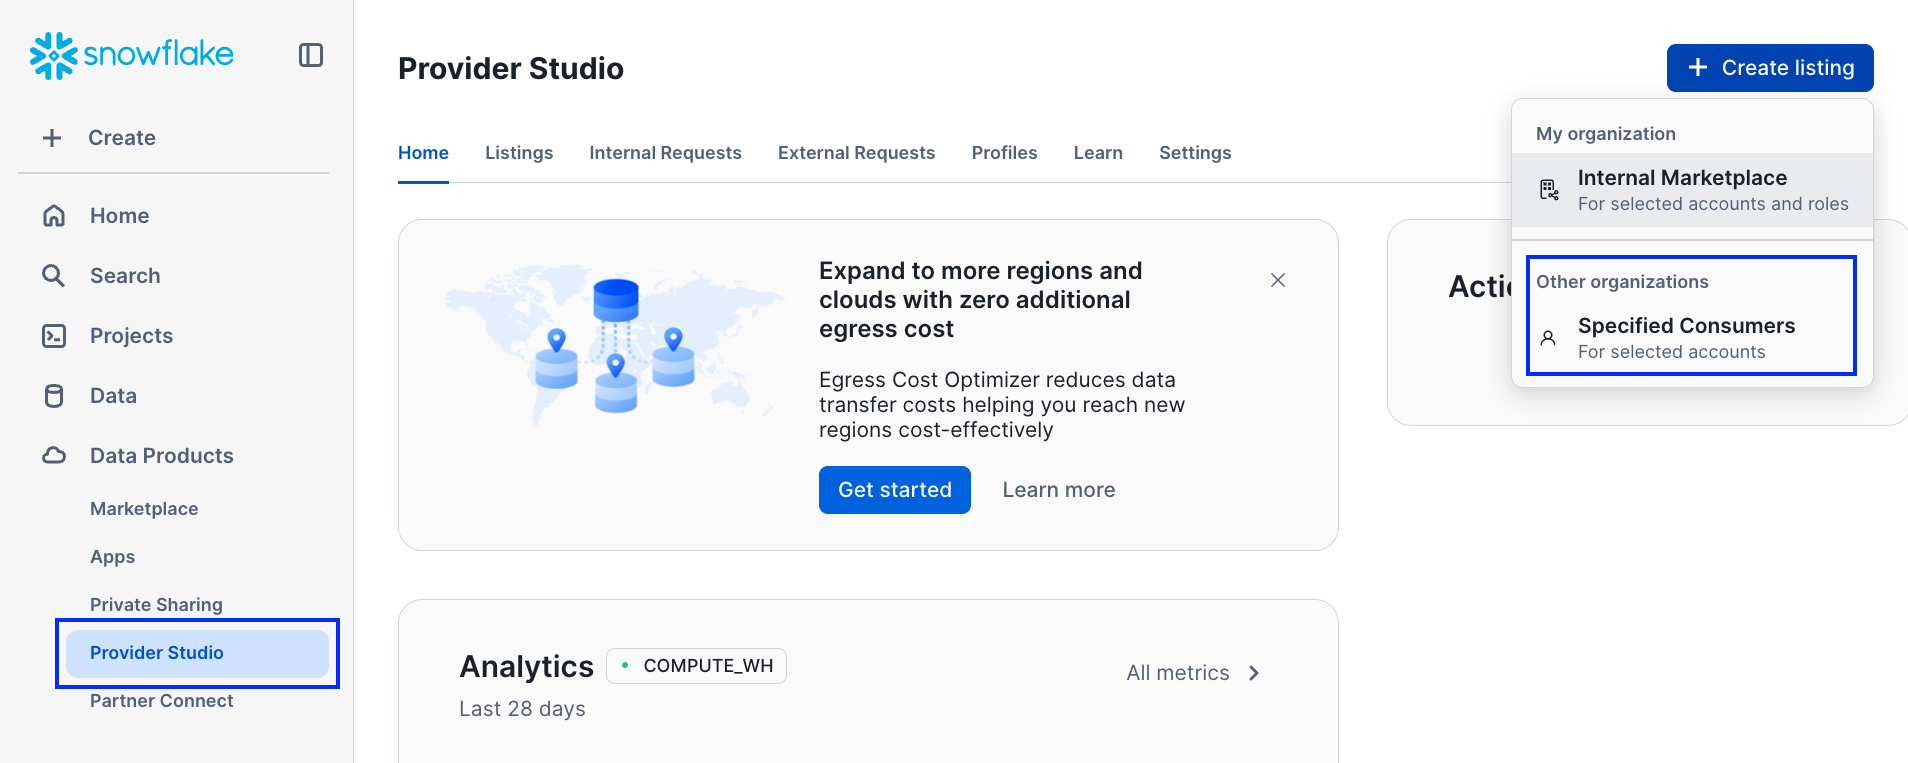
🧩 Step 1: Create a Private Listing (AWS Snowflake)
- Go to “Data Products” → “Provider Studio” in the Snowflake UI.
-
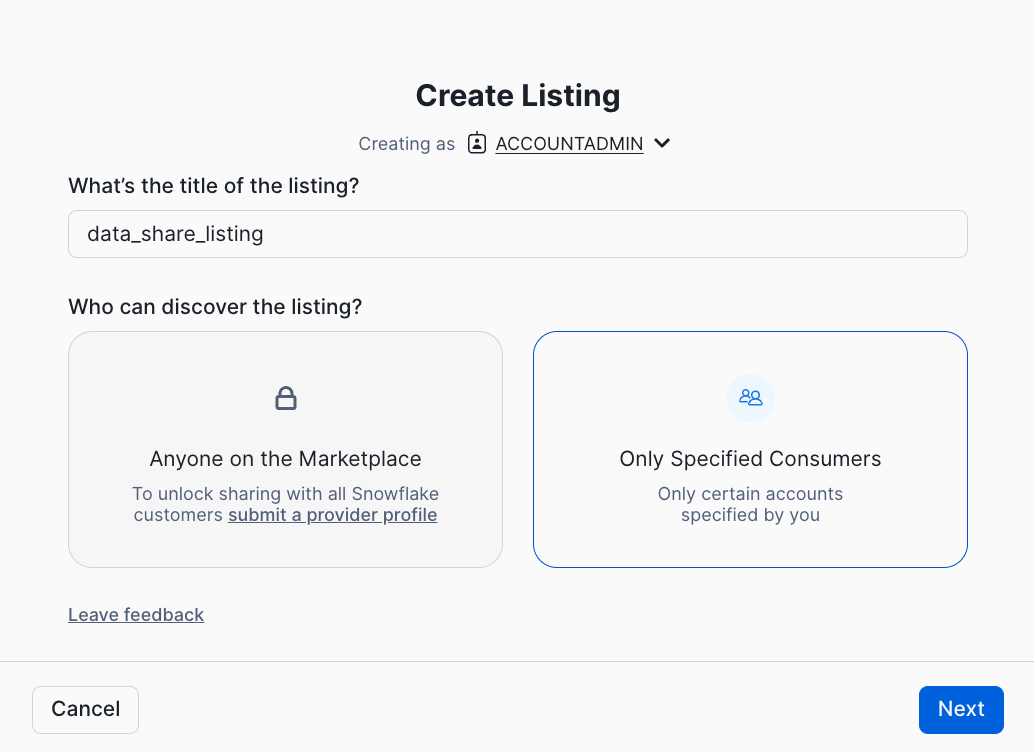
Click ““Create Listing”” and select “Specified Consumers”.
-
Give your listing a name (e.g., data_share_listing) and click “Next”.
-
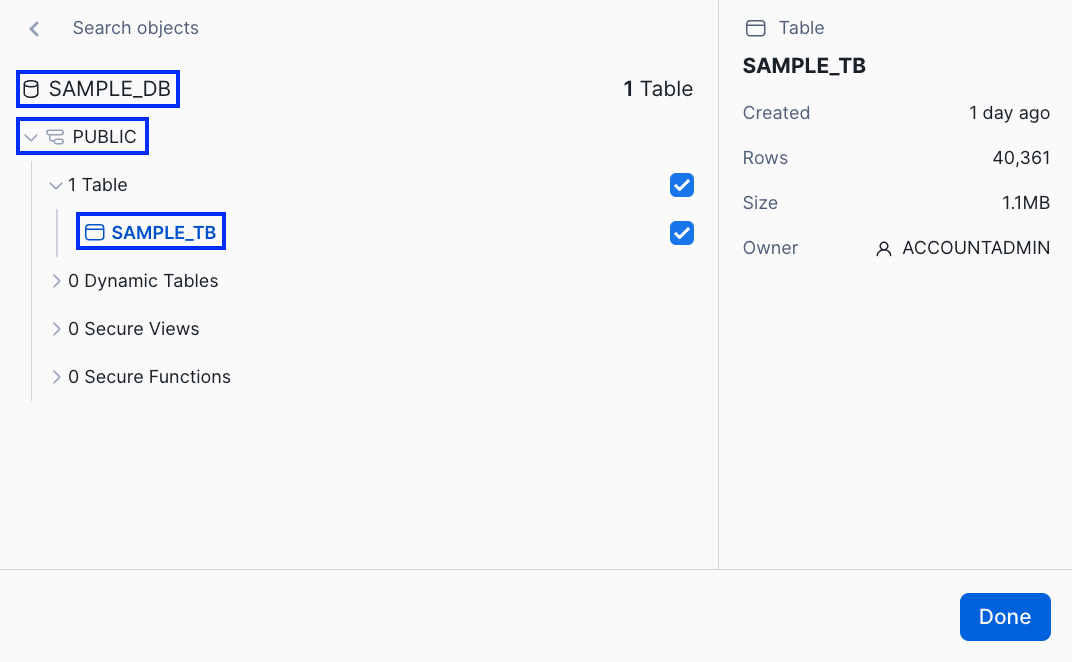
Add the required database, schema, and tables to the share.

-
Enter the Azure Snowflake account locator (you’ll get this from the consumer).
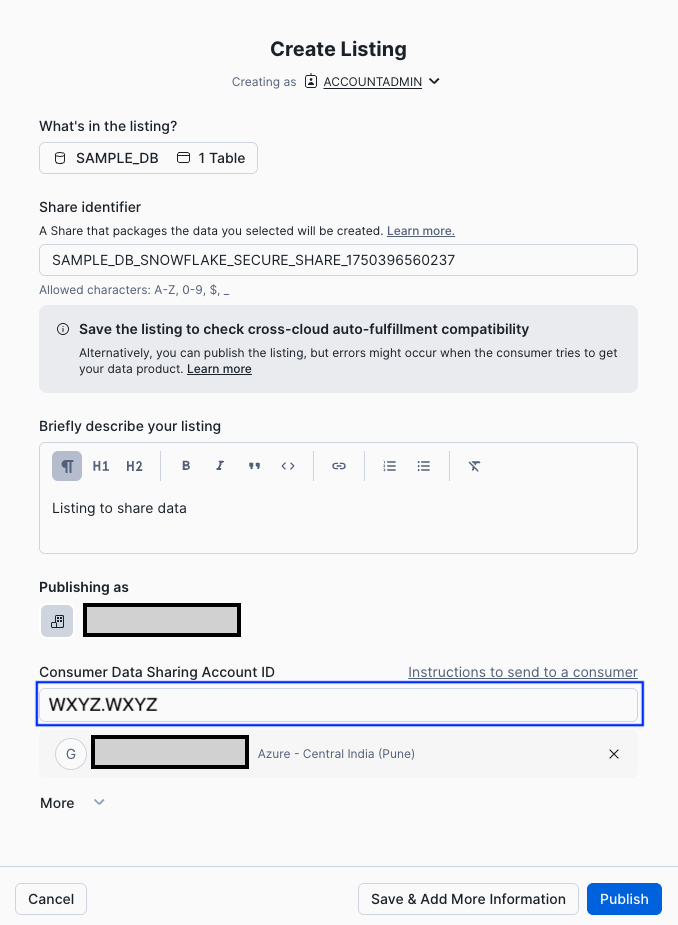
-
Publish the listing.
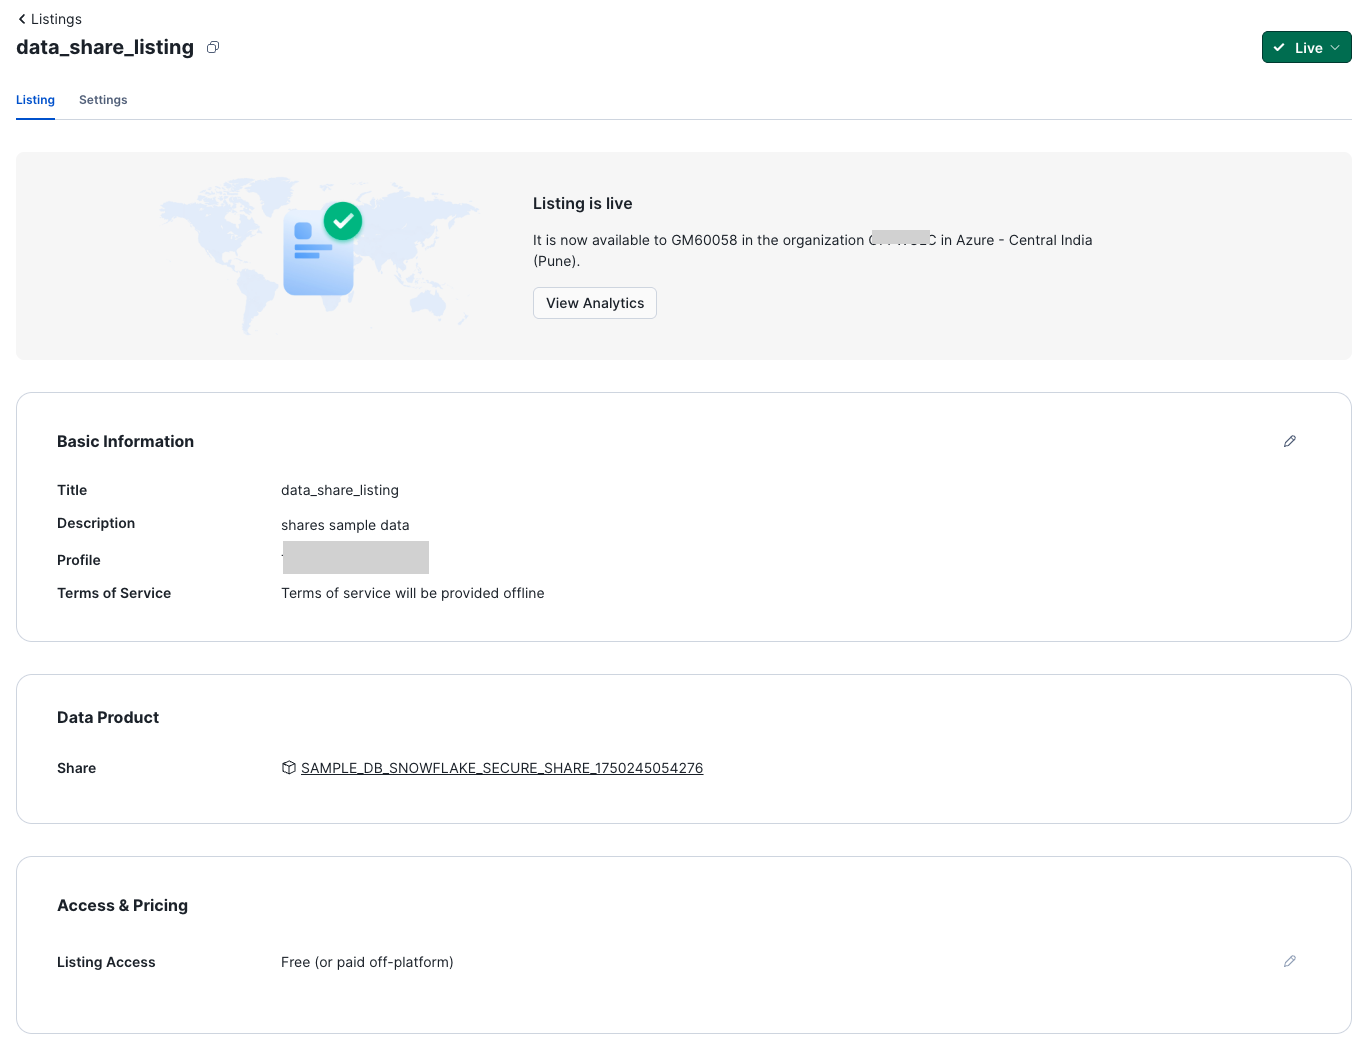
📤 Step 2: Set Refresh Frequency for the Listing
To make sure that the changes in the “provider account” are reflected quickly in the “consumer account”, follow these steps when creating the listing:
-
Go to “Data Products” → “Provider Studio” in the provider account From the Snowflake UI, click on “Listings”.

-
Select our previously created listing “data_share_listing”.
-
In the “Customer Accounts” section, select “Update refresh frequency”.
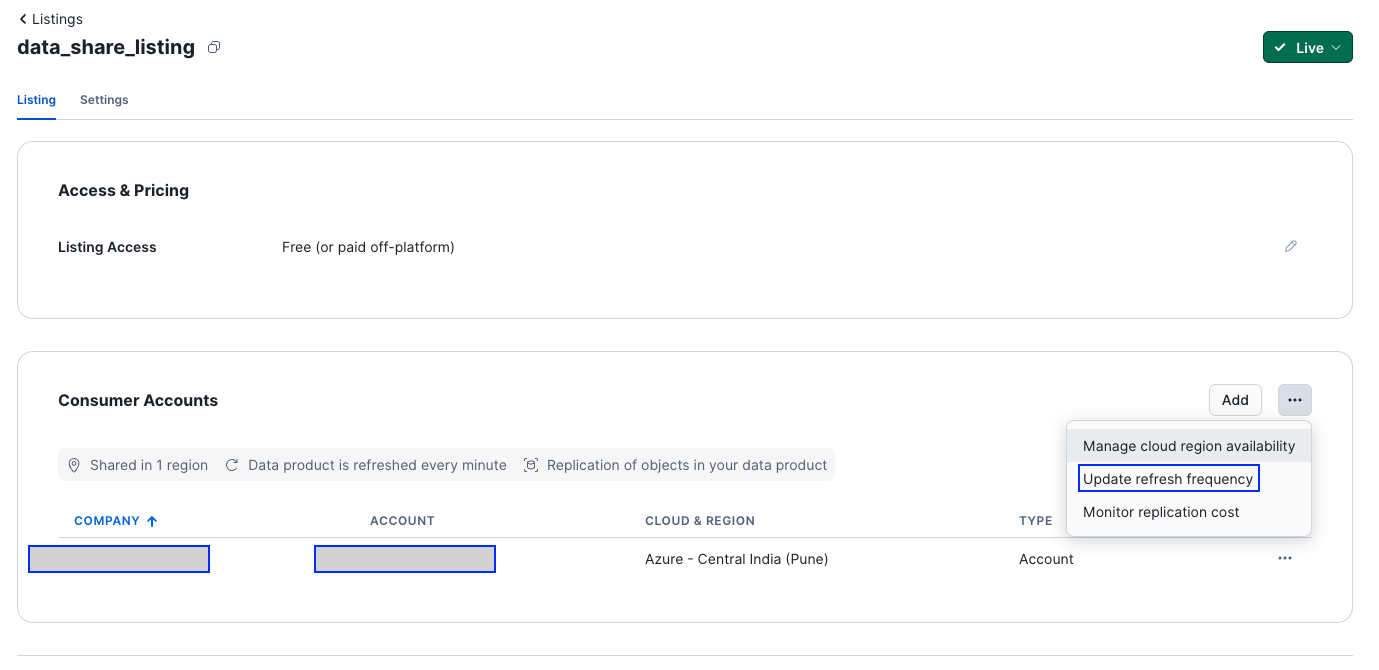
-
In the “Refresh Frequency” section
- Set it to Every 1 minute (this is the minimum interval supported).
- This ensures Snowflake checks for updates and syncs metadata frequently.

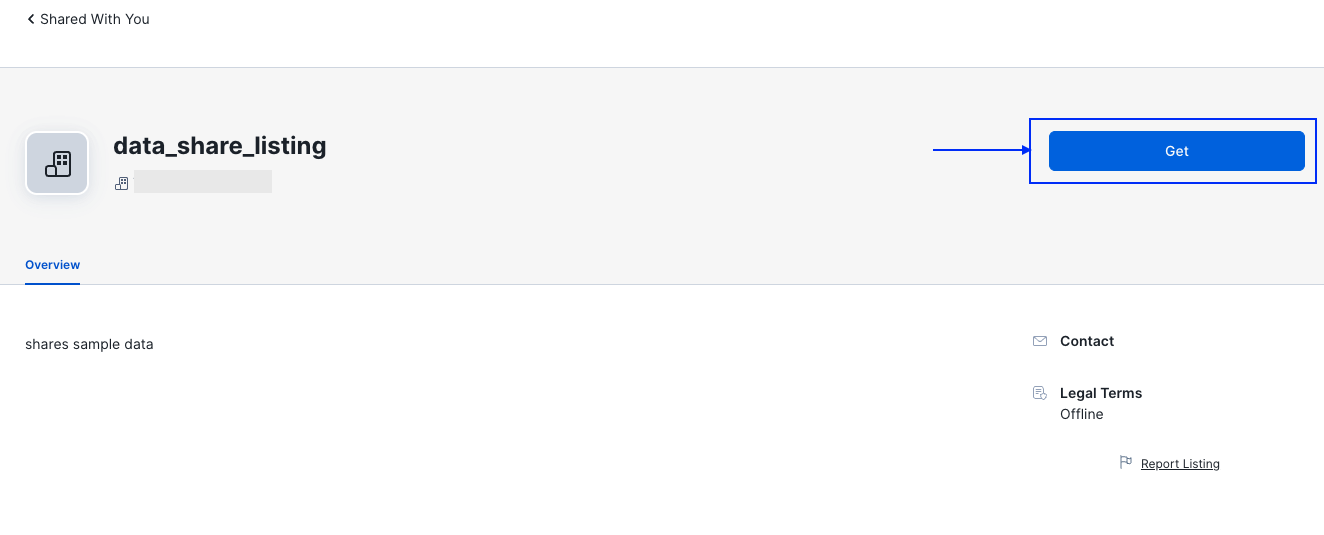
📤 Step 3: Accept the Listing (Azure Snowflake)
- Log into the Azure Snowflake account.
-
Navigate to “Data Products” → “Private Sharing”.
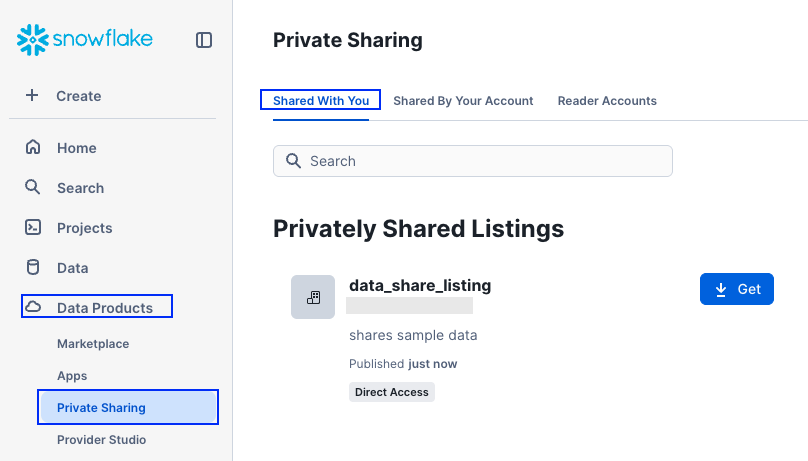
-
Locate the listing named “data_share_listing” and click “Get”.
-
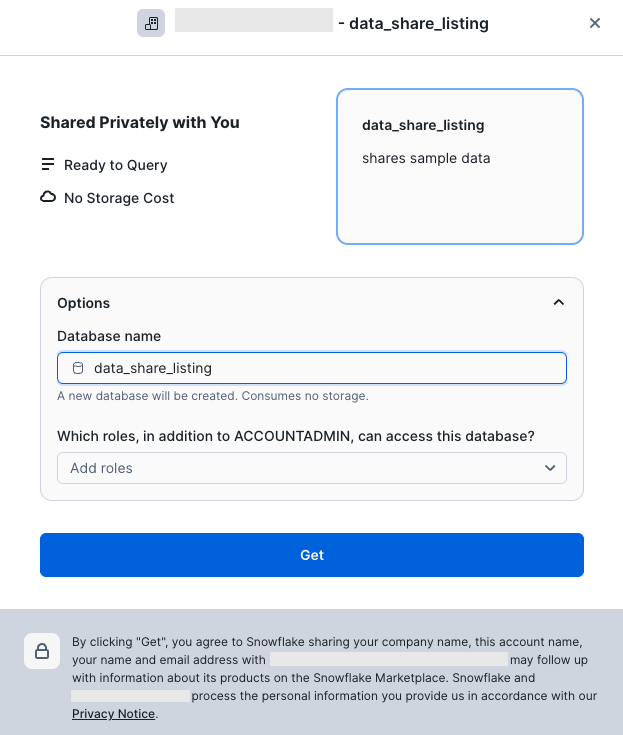
On the configuration screen, either enter a custom database name or leave the default name as is, then click “Get”.
-
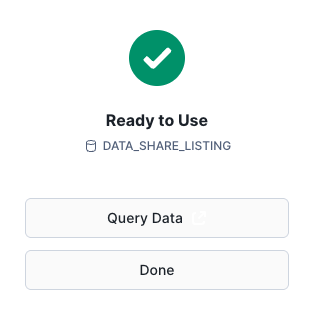
After the setup is complete, click Done.
-
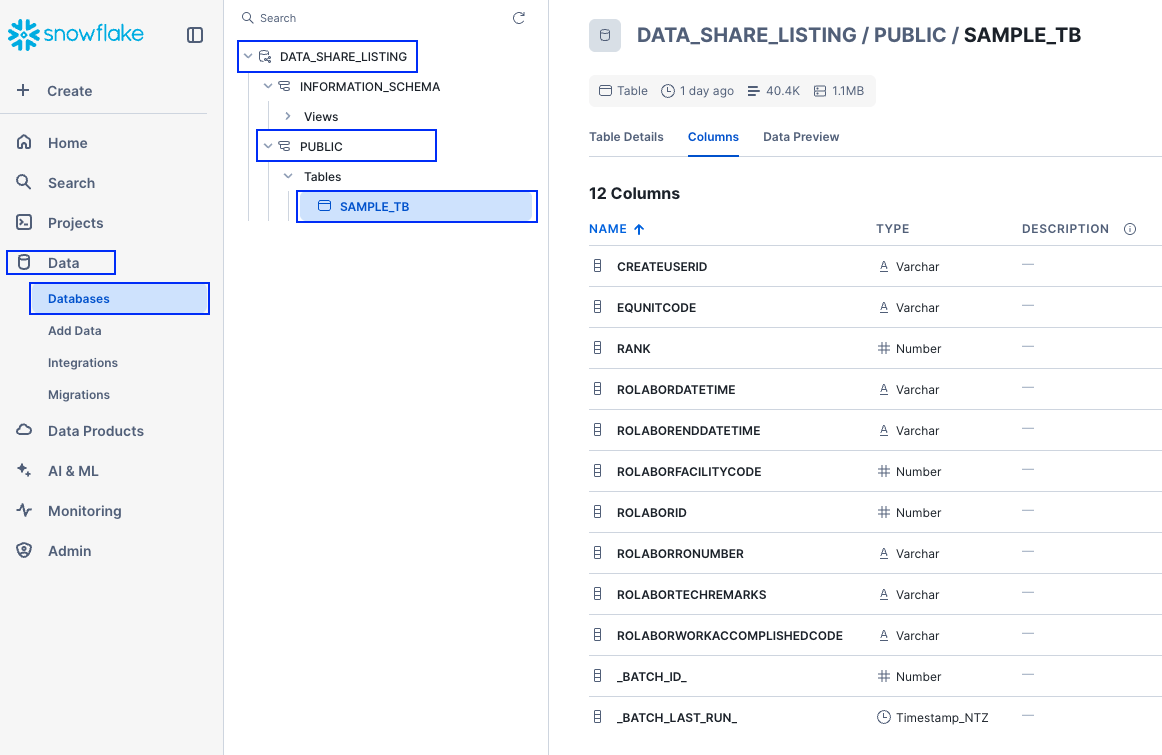
A new database will now appear in our “Data”“—this is our live connection to the shared data, ready for querying.
✅ Conclusion
In this blog, we explored how to share data across different cloud providers using Snowflake Listings, specifically from an AWS-hosted account to an Azure-hosted account. By using a Private Listing, we were able to securely publish data and access it from another Snowflake account without the need for any ETL jobs or complex integrations.
This approach is simple, scalable, and production-friendly—ideal for organizations working in multi-cloud environments or collaborating with external partners.
With just a few UI clicks and minimal configuration, we’ve established a live, read-only data link across cloud boundaries, and ensured frequent refresh intervals for near real-time visibility.
If you’re looking to simplify your cross-cloud data architecture, Snowflake Listings are definitely worth exploring.


Leave a comment